Showing posts with label How To. Show all posts

Monday, February 24, 2014

Hope Takes Flight ~ Double the pleasure. :)

I've finished Hope Takes Flight 4 and 5.

I've made this quilt five times now! Yes, four of them look very similar, whatever.

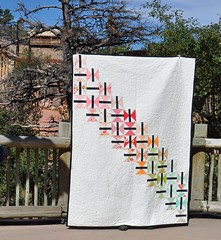
One ~ butterflies made by {Faith Circle} members
Hope Takes Flight ~ Above the Stage at church


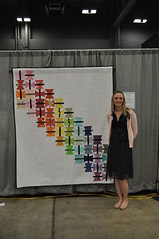
Two - at QuiltCon 2013 ~ butterflies made by {Faith Circle} members
Hope Takes Flight ~ 2


Three ~ made with Scrumptious by Bonnie and Camille
Hope Takes Flight ~ at the Zoo


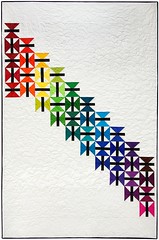
Four ~ made from one Kona Classics charm pack
Hope Takes Flight ~ Kona Charm Pack


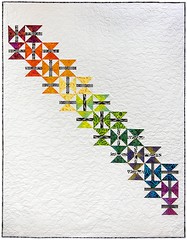
and Five ~ made from Artisan Batiks: Geoscapes 4 by Lunn Studios for Robert Kaufman
HopeTakesFlight ~ Geoscapes Batik


I kept the making of these last two under wraps since December because Robert Kaufman asked me to write the pattern for this quilt using the Classics charm pack and Artisan Batiks. I said "Are you sure you want me to do this twice?" They said "Yep. We're sure! Get busy, Melissa!"  (I was honestly confused about it for a long time!)

But twice I did! One in solids (= my comfort zone) and one in batiks (=not far from my comfort zone). This collection of batiks from Lunn Studios is really pretty. I love how each butterfly moves more than in the solids quilt. Plus, Nichole at Robert Kaufman told me that there has been a lot of research done lately that shows that batiks are selling really well with more modern quilt patterns. Who knew, right? :)

And NOW, I am pleased to tell you that the patterns are available for free on the Robert Kaufman website! Yeppers, F. R. double E. Free!!  Here is the link for the solids pattern, and here is the link for the batik pattern.

I want to make this one more time, using only two colors (well, three, if you include the black for the bodies!) like my friend Aunt Spicy did. I'll be sure to post it if I ever get around to it! :)

Also...and I would be remiss if I didn't say this...I want to thank YOU for being so encouraging and excited about this pattern from the very beginning! The first and second quilts were made in late 2012 by the members of the {Faith Circle} of the Do.Good Stitches bee, and donated to Restore Innocence for a girl rescued from human trafficking. The response that I got from finishing those two quilts was just overwhelming! Without that, I never in a million years would have considered writing up the pattern (and making it three more times, hah!). And the continued nagging follow-up from a couple of lovely friends really spurred me on to finish the pattern. And then, when I was asked by Robert Kaufman to make these last two for them, to post free on their website, I thought that was the perfect ending to the story.

And while that story is wrapping up, I've got lots more "stories" in my head that will become patterns one day. :)  I just need to find the time!

I hope you have a wonderful week, and thanks again for being so supportive. I most certainly couldn't do this alone. :)

Sunday, January 8, 2012

Mmm...That's Pretty!

"Mmmm...that's pretty!"  

"Oooh, look at that! It lays flat!"

"Gosh...that's just pretty!"

This is what I said about 134 times last week as I was making this lovely little block:


FRMQG Block Swap ~ Kelly's Dresden Plate

I made it for Kelly, who is in the Front Range MQG with me, and we're both part of the in-guild bee. This is the first Dresden Plate that I've made, and while I've always respected the Dresden and thought they were beautiful, I never really had the desire to make one.

That's why quilting bees are SUCH good things! They force you out of your comfort zone and make you do things, and try things, and stretch in ways you probably never wanted!

Honestly, the only thing about making the Dresden that I didn't like was cutting the blades! And even when I sewed all the blades together and they didn't quite lay down like I thought they should, I still didn't dislike it like I've disliked making other blocks.

In this case, I jumped on Facebook, went to The Modern Quilt Guild Facebook group and said "Help! My Dresden is warbly. How can I get those blades to submit to my will?" And within a minute, maybe two, I had two really good suggestions, and then more followed later. I was able to snip a little, press a little and work out the kinks to get the circle to lay down flat, and I was pleased!  :)

Next challenge was putting on the hide-my-edges circle. Applique. I'm not afraid of it, at all, but I wanted it to be a good circle, and I wanted the look to be clean, not raw-edged. My friend, Susan, who is also in the FRMQG, told me this trick:

Take fusible one-sided, sew-on interfacing (I used SF 101) and put the fusible, bumpy part against the right-side of the gray polka-dot fabric (cut into a square larger than the circle you want to cut), and then trace your circle with a pencil of fabric marker, and stitch around that line, with a smaller stitch-length for easier turning. Trim a 1/4" outside that seam line (I used pinking shears), and you've got a circle! Next, cut a little slit in the interfacing, and pull the polka dot fabric out through the hole and push out the edges. (I'm not explaining this right!). Next you iron it into place on the Dresden, following the directions for the fusible interfacing. The circle should fuse to the Dresden, provided you laid your interfacing right! :)  After that, I took some thread and did a little whip-stitch all the way around. Happy!! 

I think a lot of Dresden plate tutorials have you do something very similar, it's just that you use two pieces of the same fabric, right sides together, stitch a circle, cut a slit, etc. But how in the name of all things holy, do you get it to STAY while you sew?  This way, it's fused down, but not stiff like other fusibles, and it worked like an absolute charm. Charm! Loved the technique. Thanks, Susan!
DSC_0227


I really love that little block. :) I don't see myself making an entire quilt of Dresdens any time soon, like Mary did, but I definitely think they are more beautiful now than I did before.

And, in other news. Truth news...being financially responsible is HARD!!  Not eating out for lunch but once a week? HARD!! I think I've used up all my mulligans through March! :)  Ugh. Why does convenience have to be so expensive??

I'm going to do better this week, though. That's my vow. It's tempting to just take that off my list, but I know that a lot of my disposable income goes to Chick-fil-A lunch out, and if I'm going to reign in my spending, then I need to not be eating out. And not buying fabric. So far, so good, there. It's been tempting since there have been some ROCKING good sales, but I don't need any new fabric right now, I'm being good.

HOWEVER...tomorrow night, the FRMQG is having a meeting at a new-ish fabric shop in Denver called Snappy Quilts, and we're having the ladies from Sweetwater come and speak!! Yes, you read that right. Yes, you can be jealous. I am SO

EXCITED!!!!!!

Excited to meet at Snappy Quilts, excited to meet in Denver (we usually meet in Monument, north of Colorado Springs), excited to meet some new friends, excited to hear the ladies of Sweetwater talk about how lucrative fabric design, and pattern writing, and book writing can be. (hardy har har, I know...there ain't NO money in it!).  I'm glad the weather is cooperating. :) And I know it's gonna be a fabulous night. Well, for everything except my budget. :-/

I hope you have a great week!

Tuesday, March 1, 2011

Following A Trend...the Plus Pillow

Spectrum Plus Pillow ~ Finished

Have you seen the plus pillows and quilts and wall hangings all over the internet like I have? They just seem to be the hottest design right now!

In February, Sew, Mama, Sew had the I ♥ Pillows theme going on, and when Aunt Spicy, Erica and I saw this one by Cherie, we were all hooked! And got to scheming. We decided we wanted to make this pillow. All 3 of us. With the same fabrics. Because they're cool like that and I want to be like them, frankly.

A few days (and many emails) later, we had divvied up the colors and agreed to mail each other the appropriate strips so we could have have matchy-matchy pillows even though we all live a million miles apart. I got busy coloring in squares in my MS Word doc, and pretty soon, we had a pattern to work with! The problem was, we didn't have each other's fabrics! I'm not entirely sure why I didn't think about making it with other fabric first, but I tend to have tunnel vision to the nth degree, and just can not seem to modify my original plan once it's in my head.

Thankfully, though, Kelly stepped in and tested out the pattern for us. She made this lovely pillow with her scraps, and said that the pattern was easy to use and easy to modify. Which, YAY!

Aunt Spicy and Erica and I finally got our swapped strips, and I started to sew mine together. As I was motoring along, I wasn't sure I was going to love the final result (but I do!), and I didn't know what color border I should use since I wanted to make a 20" pillow cover to go on the 20" pillow I already have. :)

PlusPillow Backing Auditions

I knew wanted the pillow cover to be quilted, so after my internet friends helped me decide on Kona Charcoal as the border, I added some backing and some muslin to the top and quilted it corner to corner. I really like the effect, and will probably do that again when I do another plus pattern pillow or quilt.

Spectrum Plus Pillow ~ Quilting

Along with the suggestion for a charcoal border, a few suggested a Kona Aqua binding. Well... I wasn't about to do a binding on a pillow, but I loved the idea of something extra around the edge, so I used some aqua scraps and made what I'm calling a "flange" around the outside.

Spectrum Plus Pillow ~ Lovely Colors

It was fairly simple to do, and I imagine the installation process was similar to using ric rac or pompoms or piping. I just laid the strips along the edge before I joined the back to the front, and sewed it all together.

Spectrum Plus Pillow ~ Flange Layout


I kept the back very simple, mostly because I just wanted to be D.U.N. Done. with this pillow. :)

Spectrum Plus Pillow ~ The Back

And D.U.N. it is. It's living on it's new home, our new (to us) Ikea couch I found on CraigsList for $50.

I know Aunt Spicy has made a few of these now, too, following our pattern, with great success. And, without further ado, you can have the pattern for yourself!

(please excuse the highly unprofessional format of this pattern...you get what you pay for!)

I hope you feel empowered and able to make this pillow, now! To me, it looked WAY more complicated than it really was. :o) If you make one from this pattern, please come back and leave a comment (with a link to your blog post with pictures??!!) or email me to let me know how it went! I don't ever plan to sell this pattern, but I would like to make sure it's user-friendly, you know? :o)

Have a great day!

-----------------
While this isn't the point of this post, I have decided to enter this pillow into Stitched In Color's Blogger's Pillow Party for March. You should TOTALLY go over there and see the fabulous (and highly inspirational) pillows that people are entering! Wowzers, Man.

Blogger's Pillow Party

Saturday, February 12, 2011

Making A Hug


A couple of weeks ago, my good friend, Aunt Spicy told me she was doing a tutorial for Sew, Mama, Sew's Pillow Month and shared her tutorial with me early. The tutorial is fabulous, and if you haven't seen it, you should go check it out. It's something that I believe anyone can do.

I believe it so much that I decided to have help Mookie make it! Well, a modified version of it, but still, Aunt Spicy inspired me! I decided that Mookie could make a special fleece pillow for Dave for Valentine's Day. She's all about calling us "Mom" and "Dad" whenever anyone else is around, but if it's just us at home, we're "Mommy" and "Papa" again. She's pretty cute.

I will tell you that I spent a little time online looking at tutorials for sewing with children. Sew, Mama, Sew has a really good blog post about sewing with kids of different ages.  And I found this one on Whipstitch. It's an ongoing series, so you'll have to check back, but they make some really great points and encouragements.

I started over a week ago. Mookie is 2, and has the attention span of a two year old. :o)  If you are planning on doing this with your toddler for, say, Mother's Day or Father's Day, I would suggest starting at least a week or two early.

All of the steps are very basic, but the teacher in me is pushing and shoving her way out...so you get a tutorial! Lucky you, right. But, I will say this...there are some precious photos that make reading this tutorial TOTALLY worth it. :)

Ingredients
1/2 yard red fleece
fusible interfacing
6"x10" white quilting cotton
poly-fil pillow stuffing
red yarn
yarn needle (plastic if working with a toddler)
white embroidery floss
Crop-A-Dile (scrapbookers know what I'm talking about. It's a tool I somehow find a million uses for!)

Step 1 -- Prepare your fusible interfacing. I used a lightweight heat-n-bond, but that's all I had. I would recommend using something a bit stronger if you're going to be fusing onto fleece like I did.
Follow the instructions on the label...especially the part about writing or drawing your image backwards on the paper part of the fusible interfacing. If you've never fused for applique, you may not know what I'm talking about. Just trust me on this one. For me, the I, the ©, and the U were reversible, so it didn't matter, but I've run into trouble before when I've forgotten to reverse my image when drawing it out.
I (love) U Pillow - Step 1


Step 2 -- Iron your design onto the white cotton. Following the directions on the label, iron your design onto the white quilting cotton. Make sure it's all fused onto the cotton. And not your ironing board. :o)

I (love) U Pillow - Step 2

Step 3 -- cut out your images, your letters, your design. If your child is comfortable with cutting along a line, you could have him/her help you with this step.
I (love) U Pillow - Step 3

Step 4 -- Prepare the design for toddler sewing. This is where I used my Crop-A-Dile. I love this thing. If you've never seen one, or used one, in real life, it's a real treat...especially if you scrapbook or make cards! This thing makes light work of some of the heavy lifting in scrapbooking and card making. It came to my rescue when I wanted to pre-cut some little holes for Mookie to sew through, though. Wow. I'm glad I had this. If you don't have one, though, you could try to borrow one from a friend, or make holes in your design another way. A regular hole punch didn't work very well. You could take an exacto knife and cut a small X at each point you want your child to sew. 
Anyways, I marked out some places I wanted to punch holes. (Oh, and leave the paper on for this step...you are marking the paper here, and the Crop-A-Dile works best with the paper still attached.)
I (love) U Pillow -Step 4

Step 5 -- Punch holes in your image. This probably isn't necessary for most children, especially older ones, but I found that if Mookie had a hole already there, she was more likely to put the needle into that hole. If there was nothing there, she didn't know where to put the needle. We'll work on that, but for now, this is what worked for us.
I (love) U Pillow - Step 5

Step 6 -- Remove the paper, revealing the shiny (adhesive) side of your image.
I (love) U Pillow - Step 6

Step 7 -- Grab a large cup of patience, and set the other parts aside for, oh, 3 days. In this step, the child will "sew" an outline around each shape with the red yarn. Mookie really liked sewing, but she wouldn't do it for very long. So, we'd put it away, and pick it up later in the day, or the next day. I used one strand of red yarn, threaded and knotted the needle, and let her go. She totally understood what she was supposed to do. She didn't necessarily stitch a perfect running stitch, but she went into the fabric, and out of the fabric. Like a champ.
I (love) U Pillow - Step 7

Step 8 -- Actually, while your child is sewing the outline on the design, you can be preparing the pillow. I folded my 1/2 yard of fleece in half, and then cut about 15 inches in, so I had 2 layers of fleece. I then freehanded my heart, and pinned around the heart. I started to cut around the pins, but I decided that wasn't necessary, so I stopped. :o)
I (love) U Pillow - Step 8

Step 9 -- Sew heart pieces together. It wasn't necessary to cut around the outside of the pins because I was going to sew it, then cut around the seam! I used a zigzag stitch and stayed pretty close to my line (perfection is not necessary here because the stuffing will make your lines go out the window anyways!). I sewed almost all the way around the pillow, but left a 4" gap for stuffing the pillow.
I (love) U Pillow - Step 9

Step 10 -- NOW you can cut the heart shape! I cut about 1/2" past the seam. Again, perfection is a waste of your time. (doncha love it?!)
I (love) U Pillow - Step 10

Step 11 -- Admire your work. And grab another cup of patience because it's taking your child a sweet forever to sew that silly thing! :o)  Or, just put it away for another day.
I (love) U Pillow - Step 11

Step 12 -- Prepare to fuse the image onto the fleece. (make sure the shiny side of your design is down, touching the fleece, because that's the adhesive and you don't want to fuse the © to your iron! I just put them down to determine placement while the iron was heating up.
I (love) U Pillow - Step 12

Step 13 -- Fuse image to fleece. I place a scrap of muslin between my iron and the fleece and yarn, just because I didn't know if the iron would melt any of that. It was a good thing. You can check your work to see if the image did fuse to the fleece, and if not, you can iron again.
I (love) U Pillow - Step 13

Step 14 -- Admire your work. It's gonna look good!
I (love) U Pillow - Step 14

Step 15 -- Stuff the pillow. I pulled little handfuls of the pillow stuffing out of the bag and piled them up for Mookie to stuff into the pillow. She had a hard time at first, until I pinned the front and back sides of the opening, well, open for her. That made her job so much easier. Have your child stuff away.
I (love) U Pillow - Step 15

Tell me, though...did your child open his/her mouth subconsciously as they were stuffing the pillow? Because I still get the biggest kick out of looking at these pictures of her. Mouth wide open watching Mickey Mouse while she stuffed this pillow she's so proud of. :o)
I (love) U Pillow - Step 15

Dude. You can't make this stuff up. I love this girl so much.
I (love) U Pillow - Step 15

Doesn't she look proud of her work here? And she should be! She is making something for Dave that he will treasure.
I (love) U Pillow - Step 15

Step 16 -- Test it. She wanted to make sure it was fluffy enough. It was.
I (love) U Pillow - Step 16

Step 17 -- Sew 4" opening closed. It was a little tricky, but not terrible to sew an already stuffed pillow.
I (love) U Pillow - Step 17

Step 18 -- Sew border around pillow. I threaded a yarn needle with 6 strands (one layer?) of embroidery floss, and I sat her on my lap, and let her go to town sewing a border around the pillow. She never hurt herself, and she did a pretty good job of staying fairly close to her last stitch. I think this step took 3 or 4 sessions.
I (love) U Pillow - Step 18

Have your child stitch all the way around the pillow.
I (love) U Pillow - Step 18

And, the big finish:
I (love) U Pillow - Finished!

It's certainly not perfect, and I helped, probably, more than I needed to, but Mookie is pretty proud of herself and her work.  (the picture at the top was taken when Mookie gave the pillow to Dave)

****
I have entered this pillow into Stitched In Color's Blogger's Pillow Party. There are some truly amazingly beautiful pillows there, but I did it because I want to encourage other moms of young kids to start sewing with their littles early! It may not win any awards, but it won her father's heart, and that's all that matters. :o)

Blogger's Pillow Party

Friday, January 28, 2011

Wrapping Infinity Around Your Neck

Infinity Scarf ∞ Short Loops

I love it when a plan comes together, don't you?

A few weeks ago, Traci posted a picture of herself wearing a new Infinity Scarf that she had made. I immediately wanted one. Except I wanted to use voiles. I don't believe I'd ever actually gotten my mitts on any of the voiles, but I knew people said they were just LAHVERLY.

Then earlier this week, a quilty friend from out of town emailed me and said she was alluvasudden gonna be in town, and asked if I wanted to go fabric shopping one evening.

Did I?!  There's a fabric shop in Denver called Fancy Tiger that I've been wanting to go to a few years, and since her local quilt shop is Joann's (bleck!), we decided to strap in the girlies and go to Fancy Tiger!

I knew that the only thing I really wanted was to see what voiles they had. I admit that I purchased a few other pieces, but that's beside the point. :o) At one point my friend looked over and saw a SALE table. (play "Hallelujah Chorus" here). The first thing I found was the lovely Anna Maria Horner Little Folks Kiwi solid voile. It's such a beautiful, fun, bright, springy color. And the feeling of the voile is just dreamy. It's delicate and flowy and drapey and rich and silky. I knew I needed some of that regardless of whether or not I found anything else!  But then I found the equally lovely AMH LF Four Square Sweet voile. I wasn't sure how they went together, but I set them on the table, and stepped away. From a distance, they looked really good together, so I, not knowing anything about making an Infinity Scarf, asked for 1/4 yard of each. My friend decided she wanted to get 1/2 yard of each. Sweet!

After we got home and I put the girls to bed, I spent an inordinate amount of time on the web searching for patterns. Cart before the horse, anyone?  I didn't find a single one that I liked. Anna Maria Horner even has a tutorial on her blog, but she used 1/2 yard cuts - one of her Innocent Crush velveteen and one of a voile, and she didn't say how much of each fabric to use, so I couldn't really use her tutorial. I was a bit nervous that 1/4 yard wouldn't be enough, but I decided to give it a shot. It's a scarf, for Pete's sake, right?!  :o)

So, since I couldn't find a tutorial I liked for me, here's one for you.

Materials:
1/4 yard of two coordinating fabrics, any material you like, really. If you want to have a solid scarf, then just use 1/2 yard cut.
*Note: the voiles happen to be 54" wide, so if you use something else, you will need to compensate for that! Which I think is just one more reason to use voiles!
A ton of pins
Thread
Hot Iron

Steps:
(1) Trim your voiles (I'm going to speak of voiles here because that's what I used and you should, too) so that they are identical in size and the edges are straight. It can be 9" wide, or 9 3/8" wide, or 8 7/16" wide, it doesn't matter. Just straight and identical.

(2) Put right sides together and pin, pin, pin. It can be tough to find the right sides with voiles, but I found it doesn't really matter. These are slippery, so pinning now will make your sewing life SO much easier!

(3)Next you want to sew along the long edges only. I used a 3/8" seam allowance because I've never sewn with voile before, and I read that it's smart to use a little wider seam allowance. (Note: I added some notes at the bottom about how I learned a different way. I think it's actually easier. And much tidier!)
    Infinity Scarf - Making The Tube
    (4) Now you have an inside-out tube. I pressed the seams flat to set them, then I turned it so that the right sides were out, and the seams were hidden. Infinity Scarf - Outside Out
    (5) Then, because the tube was a bit puffy, I decided to iron the sides so the scarf tube was flat. I don't know if you have to do that or not, but I did.
    Infinity Scarf - Pressing the Seams
    (6) Now to take the scarf to infinity ∞. Some people call this a "circle scarf," but I'm a nerd, and I wanted mine to be a true infinity symbol where there is no beginning, and no end, and there is a twist. Either way, you now have to put your two short sides together and sew them. I don't know much about sewing, but I know I'm not very good at it, so I have to take extra steps to make the final product look right. You might not have to do this next step.
    In preparation of joining the short sides, I ironed down a 1/4" fold on one of the short sides.Infinity Scarf ∞ Preparing the Intersection
    (7) Next I took the other short end and put it about 1/4" inside the folds. In keeping with the desire for this to be a true infinity ∞ scarf, I twisted my scarf tube one time so that the intersection would have the solid on one side, and the print on the other. Then I pinned it. Infinity Scarf ∞ Pinning the Intersection
    (8) Anna Maria says you should hand stitch this intersection using a blind stitch. I chose to machine sew that intersection for a couple of reasons. (a) I forgot that she said to hand stitch it. (b) I don't think it's necessary since I used 2 voiles, and she used a velveteen and a voile. I did use a matching thread for the green, though. :o) I don't think the hand sewing vs machine sewing really matters in the end. I'm sure it would look more professional and more finished and less like a 9 year old did it, but I've been wearing this scarf all day, and it hasn't bothered me one bit! Infinity Scarf ∞ Sewing the Intersection
    Infinity Scarf ∞ Infinity Intersection

And you are FINISHED! What did that take you, about an hour? If that? With a cookie break?

You can wear it a few ways, either one long loop.
Infinity Scarf ∞ long

Or two short loops.
Infinity Scarf ∞ Mookie and Mama
I like it this way because it keeps my neck nice and toasty warm.

(ETA: To accomplish the double loop, I first put it on long, as one loop, then I grab the bottom, twist it once close to my neck, and then take the larger loop in my hands and put that over my head. Once both loops are on my neck, I can finagle them to be comfy.)


You could also have one long loop and one short. I don't have a picture of that, but you've got a vivid imagination, right?

(ETA also: I discovered another way to make it so that the seams are actually hidden or sealed. It's just a bit hard to explain, so if you have questions, please don't hesitate to ask!)  

Here goes: (picking up after Step 2 above)
Step 3. Pin right sides together. Stitch (3/8"-ish seam) almost all the way around, but leave a 3-4" gap on one of the long sides near a short side. Clip the excess fabric at the corners, but not the stitches! :)
Step 4. Reach into the tube and reach all the way to the opposite short end. Grab it and pull it up to the near short end. You will need to give it a slight twist so that the white fabric from one short end touches the green from the other short end. (This is SO hard to explain!!).  You'll need to press out the corners so they're as pointy and square as possible. Now, stuff the inside short end into the corners of the outside short end and pin. Sew a second seam to attach those two short sides together. 
Step 5. Pull the right side of the tube out through your gap, and straighten it as much as possible. You should be able to see your seam where the white fabric is stitched to the green, and on the reverse, the green is attached to the white. (Gosh. Maybe I need to try to do a video of this?)  Anyway, I took out my Best Press and pressed the seams all the way around. I just like to do that because it looks SO crisp!
Step 6. Hand-stitch your 3-4" gap closed, and admire your work!


If you make this, let me know how it goes!