Wednesday, March 19, 2014

{WiP} Wednesday - Week 12

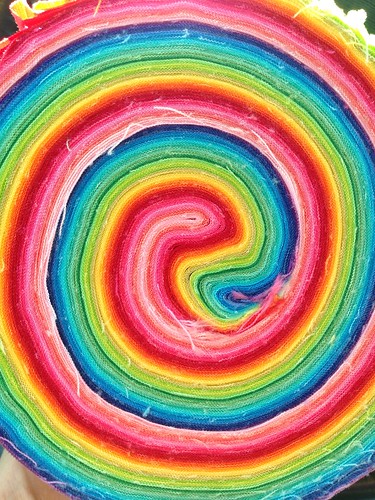
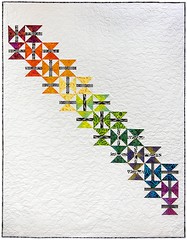
I've got something pretty up my sleeve!  It's for that new pattern I mentioned last week, and involves the New Brights collection of solids from Robert Kaufman, although I'm not using all of them.

                                         Kona Love❤️
                                                    
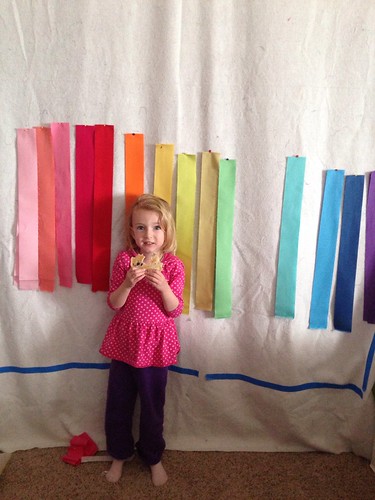
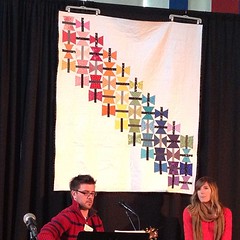
My sweet little 3 year old saw the rejects hanging on the design wall and said "Mommy, I love your quilt xylophone!"  So...I guess I know what I'll be making when this is finished!  (I especially love how she called it a quilt xylophone - it's just so like that sweet little girl of mine to transpose her words. :o)  )

Kona Love❤️


And I've been working on another secretive quilt project, that I'll show you in about 4 months...maybe...if I remember...but here's a snippet:


My 5 year old wasn't pleased that I made 2 zippy pouches for our guild swap, and didn't make one for her. (She also didn't like either of the ones I received in return -- more for me!), so she chose these fabrics for me to make a pouch for her (WHEN, child, WHEN do you think I have time for this?????)  But I love this color combination!


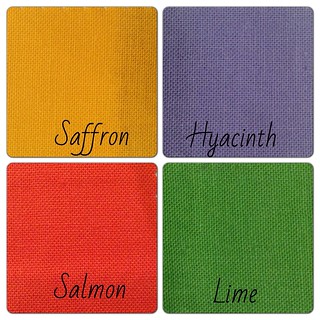
Have I mentioned that our guild is participating in an all-Colorado Modern Quilt Guild challenge? Everyone who is participating received 4 fat quarters of Free Spirit Solids in colors that represent Colorado, and we are to make a modern quilt that is inspired by Colorado.  (except two of the colors aren't right in this picture, sorry!)

Colorful Colorado MQG Challenge 
fabrics


Well, I've had at least 5 ideas, but I am VERY VERY VERY excited about the one that I had Sunday while driving to church. It is inspired by Colorado, and Denyse Schmidt, and Latifah Saafir, and QuiltCon, and my heritage...OH, I can't wait to get that started!!!!  However, comma, I must finish the first thing I mentioned...and then the fourth thing I mentioned...and maybe then the second thing I mentioned if I can do it quickly...


I hope you are having a great, and crafty, and productive week!

(linking up with Lee at Freshly Pieced)

Thursday, March 13, 2014

{WiP} Thursday ~ Week 11

I hope you've had a great week. The weeks always go by super fast for me! 

(almost two weeks ago, now!) Last Friday I gave a lecture/trunk show on modern quilting to a local traditional guild, and I think it was well received. (At least the people who came up to me afterwards were nice!)

Here I am showing off the awesome mini quilt Elizabeth Dackson of Don't Call Me Betsy made for me in a swap. (I won the jackpot, didn't I?) She turned it into a pattern if you want to make one for yourself. :o)
                                          

Here's the hexie quilt I made during Madame Samm's Hexie Queen blog hop last fall, and I'm donating it to Crafters For Courage so they can auction it off and raise money to build another Courage House for girls rescued from sex trafficking. I recently read that approximately 1% of the people rescued from sex trafficking have a safe place to go, so they often find their way back into the traps of the pimps. (We all need to do more to end modern slavery.)
                                                        

And this is the longest (and largest!) WiP, my Mod Mosaic bee quilt. The Mod Mosaic bee started 2 years ago, if that gives you any idea. :-). It's a king-sized quilt, and all that's left is the binding. Unfortunately, I didn't think about Susie's Magic Binding technique before I started binding this. :-/ But it's for ME, so it can sit. :o)
                                            

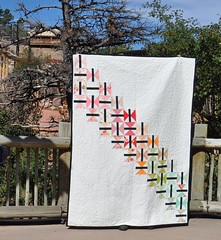
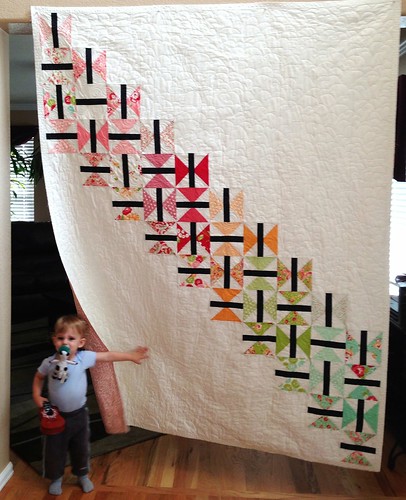
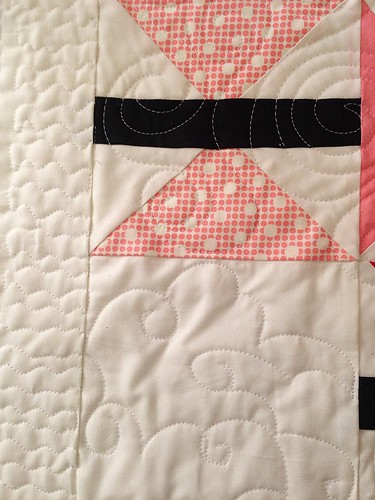
My newest WiP is this improv beauty of solids. I am totally crushing on it! Here is a bit of one of the sections:

And here is a picture of the whole thing. I hope to get it quilted in the next week.


And something I've been wanting for over a year? The Sew Together bag by Michelle of Sew Demented!  It took me a full week (because I kept making stupid mistakes), but I love it!  And, yes. In case you are wondering, I am planning another one. Hopefully it won't take me another year! :o)


Here's the outside. I guess I've been in a gray mood lately! Everything I've done lately, including a super new pattern I'm working on, is gray! No worries, though. Rainbow is still my favorite color, and I'll get back to that really soon. :o)


And, finally, a super cute dumpling pouch and key fob for our Front Range MQG pouch swap on Saturday.


That'll probably be it for things I can show for a while. I've got to get my nose to the grindstone and sew up the new pattern (very exciting and daunting and nerve-wracking and oh-I-hope-this-turns-out-like-in-my-head stressing!)

I hope you all have a wonderful week! I'm planning to post a giveaway -- soon? -- just need to get myself together!

Blessings,
~Melissa

Wednesday, February 26, 2014

{WiP} Wednesday - Week 9

Man, I've missed linking up with Lee for {WiP}Wednesdays! It always kept me on track, keeping WiPs in my face, and keeping me blogging!

Well, I had a little quilty heart-break last fall, and I didn't feel like blogging much. :-(  No big deal, not even really worth talking about, but I've sure missed blogging!

I've been very busy, though! Very. :o) 

I made my Hope Takes Flight quilt two more times, and Robert Kaufman now has the pattern on their website for free.


Here is the one made from a Kona Classics charm pack (and the pattern HERE)
Hope Takes Flight ~ Kona Charm Pack


And here's the batik version (and pattern HERE
HopeTakesFlight ~ Geoscapes Batik


Not too shabby for batiks, eh?  Research has shown that a good number of people enjoy making modern quilts with batiks, and Robert Kaufman wanted to show a pattern that uses both. I'm so thankful they wanted my butterfly pattern for that! :o)

And I did another top secret quilt that I will show you someday. :o)  But now that those three major projects are finished, I'm back to sewing for FUN!  :o)

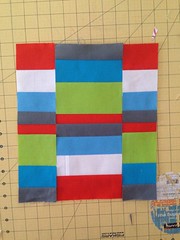
Like this. I'm not really a fan of stick-you-hand-in-a-bag improv piecing (my brain can't handle all that chaos!), but I do love no-expectations-no-plan improv piecing. :o)  I started sewing strips together, thought the orange strip was too thick, so I cut it down the middle, and sewed the pieces together on opposite sides. Then I decided the whole thing was too wide, so I cut a piece off the left and flipped it. Loved that, so I did it on the right. I really love the way your eye moves across the block, and I love how this is coming together! It's going to be the back of a special baby quilt.

No-plan Improv


The Front Range MQG retreat is this weekend, and I've decided that I'm only going to work on things for ME. No charity blocks, no bee blocks, no gifts. Only things for me (and maybe my children), because I very rarely sew things for me. And I've got a list as long as my arm! :o) We'll see how well that works out...

I hope you have a wonderful, crafty week! Thanks for reading! :o)

Monday, February 24, 2014

Hope Takes Flight ~ Double the pleasure. :)

I've finished Hope Takes Flight 4 and 5.

I've made this quilt five times now! Yes, four of them look very similar, whatever.

One ~ butterflies made by {Faith Circle} members
Hope Takes Flight ~ Above the Stage at church


Two - at QuiltCon 2013 ~ butterflies made by {Faith Circle} members
Hope Takes Flight ~ 2


Three ~ made with Scrumptious by Bonnie and Camille
Hope Takes Flight ~ at the Zoo


Four ~ made from one Kona Classics charm pack
Hope Takes Flight ~ Kona Charm Pack


and Five ~ made from Artisan Batiks: Geoscapes 4 by Lunn Studios for Robert Kaufman
HopeTakesFlight ~ Geoscapes Batik


I kept the making of these last two under wraps since December because Robert Kaufman asked me to write the pattern for this quilt using the Classics charm pack and Artisan Batiks. I said "Are you sure you want me to do this twice?" They said "Yep. We're sure! Get busy, Melissa!"  (I was honestly confused about it for a long time!)

But twice I did! One in solids (= my comfort zone) and one in batiks (=not far from my comfort zone). This collection of batiks from Lunn Studios is really pretty. I love how each butterfly moves more than in the solids quilt. Plus, Nichole at Robert Kaufman told me that there has been a lot of research done lately that shows that batiks are selling really well with more modern quilt patterns. Who knew, right? :)

And NOW, I am pleased to tell you that the patterns are available for free on the Robert Kaufman website! Yeppers, F. R. double E. Free!!  Here is the link for the solids pattern, and here is the link for the batik pattern.

I want to make this one more time, using only two colors (well, three, if you include the black for the bodies!) like my friend Aunt Spicy did. I'll be sure to post it if I ever get around to it! :)

Also...and I would be remiss if I didn't say this...I want to thank YOU for being so encouraging and excited about this pattern from the very beginning! The first and second quilts were made in late 2012 by the members of the {Faith Circle} of the Do.Good Stitches bee, and donated to Restore Innocence for a girl rescued from human trafficking. The response that I got from finishing those two quilts was just overwhelming! Without that, I never in a million years would have considered writing up the pattern (and making it three more times, hah!). And the continued nagging follow-up from a couple of lovely friends really spurred me on to finish the pattern. And then, when I was asked by Robert Kaufman to make these last two for them, to post free on their website, I thought that was the perfect ending to the story.

And while that story is wrapping up, I've got lots more "stories" in my head that will become patterns one day. :)  I just need to find the time!

I hope you have a wonderful week, and thanks again for being so supportive. I most certainly couldn't do this alone. :)

Tuesday, January 14, 2014

Hello Again! {DIY Project Life Cards Tutorial}

Yes, I've been gone forever. I'm sorry. Maybe I'll tell the story sometime.

I've been sewing. A lot, but can't show you most of what I've done yet, but I have been wanting to get back to blogging, and this is my toes-in-the-water post. I'm not converting all my crafting energy to Project Life, don't worry. It's just a little thing I've done lately. :)


I'm trying to keep track of our year with Project Life again this year. Hopefully I'll do better than last year, but seein's how far I got last year, it won't be hard to improve. :)

There are SO doggone many cute Project Life journal cards. So many that I can't hardly choose which ones to use, and get paralyzed in the overwhelming sea of color and icons and shapes and quotes!  Too much! But the other night, as I was putting the girls to bed, I started to play around with my Rhonna Designs and A Beautiful Mess apps on my phone, and I was very pleased to come up with some simple cards that I can print at home! I bought these apps when they first came out, and really love them.

I don't have Photoshop, and while I could get it and learn it, I don't like to spend a lot of time on my computer if I don't have to. Plus, I spend about 30 minutes in the girls' room every night with only my phone, so why not, right?  After I design them, I use the photo editing tool in my iPhone's Camera Roll to crop the cards to 4x3", and then when I print them, they'll drop right into the PL slots.  (Note: I can also print each card as a 4x6" card, and it will work, too.)

Here is a collage of a few others I made. I am laying them out in a Word document and printing them at home. I know I can also have these printed as photos, but I want to be able to write on them.


Anyways, I put a few pictures on Instagram the other night, and a few people asked how I made them, so here is a tutorial. I promise you it is easier than the 400 steps here makes it seem -- I just wanted to be thorough. :)  If you have any questions, please don't hesitate to ask!

Step 1: Create background -- either take a picture of a card or paper you want to use as your background, or create a background in A Beautiful Mess app...that's what I did. :) 
  1. Open A Beautiful Mess, and click on Collage. I then chose the horizontal collage, and picked the top one with only two windows.  If you want to create vertical journal cards, then pick the vertical collage
  2. Click on Color at the bottom, scroll to the color you want to use, and click on it. Repeat for the other window. 
  3. Finally, click on Frame Size and move the slider all the way to the left, thereby removing any sashing between the two windows. 
  4. Click the check mark at the top, then click Done, and Yes. If you want to embellish your background in A Beautiful Mess, then don't click Done. :)
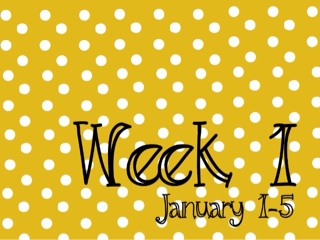
Step 2: Embellish -- you can do any number of things here, to achieve your ultimate design. This is how I created the polka dot background and letters on the Week 1 card at the very top.
  1. Open Rhonna Designs, and choose the background image you just created and saved in your Photos folder.
  2. Tap Crop, and then tap the sunburst icon for Design Packs.
  3. Scroll down and click on Insta Chalk, and then select either of the two frames (second or third from the left). Rotate it and expand it so that it is horizontal and takes up the width of your screen. This is approximately 3" tall and 4" wide.
  4. Next, push the + symbol in the upper left corner, and the Design Packs will open up again. 
  5. Scroll down to Insta Patterns, then scroll to the right and select the large polka dots. Move them to the lower left hand corner, and click the + symbol again.
  6. The Design Packs will open up again, but you want to go to the bottom of your screen and click on the polka dots again, and move them into position next to the first set of polka dots.
  7. Click the + symbol again, and continue choosing polka dots, moving them into place, and clicking the + symbol until you have filled up the frame. There will be some dots to the right of the frame, and that's okay -- you'll crop them off later. :)
  8. Once the frame is full, you are ready to add your words.  Tap Done at the top.
  9.  Click on the T at the top left, and your font packs will pop up. I played around with all of them, and chose a font from Rhonna Fonts 2. Click that font pack.
  10. A text field will open up that says "DOUBLE TAP TO EDIT". Click there, and type in Week 1, then click the small X in the keyboard window. 
  11. Then change the color of the text to the color you would like to use, and then start playing with fonts. You'll see that the font of your text is changing, but the text is not. If you don't like any of the options in that font pack, then gently pull the font bar to the far left, and you'll see the Font Packs open up again.
  12. Play around until you find the font you like, and then increase the size to fill the frame.
  13. To add the dates below Week 1, tap the + in the upper left hand corner, and another text field will open up. Type in January 1-5, change the font color, and then size to the one you want, and move it into place. (Almost done!)
  14. Finally, tap on the edge of the frame, and a pink line should appear around the entire frame with a dot on the lower left. This lets you know that you have selected the frame, and not any of the polka dots.
  15. Click the button in the upper right that has 3 bars, which takes you to the Design Options. With the frame highlighted, click Delete, and your frame should disappear.
  16. Now that you are finished, click the 3 bars in the upper right again, and choose Share at the bottom. I choose Save Image, and it's saved in my Pictures folder on my phone.
Step 3 : Cropping to 3x4" -- I am making these cards 3x4" so they'll fit into the Project Life slots, so that's what these instructions will help you do.  Please note, I have an iPhone5, and this works for me. I don't know anything about any other phones, so I suggest you play around with your features if you have a different kind of phone. :)
  1. Open the image in your Camera Roll (or whatever it's called on your phone).
  2. Click Edit in the upper right hand corner, and then click the Crop icon in the lower right. 
  3. Click Aspect, and then choose 4x3. You can move your image around inside the crop window to get it to be the right size and layout, and then click Crop in the upper right hand corner. 
  4. If it looks right, click Save, and you're done!

I really am having fun playing with these, creating Week cards, creating cards that are meaningful to me and my family, creating cards that I know I will use.

If you're into Project Life, and have these two apps, or other apps like them, then I encourage you to play around and create some of your own, too! It's pretty fun. :)   And if you have any questions (or if I made a mistake), don't hesitate to ask.

Wednesday, September 18, 2013

{WiP} Wednesday ~ Week 38

Hiya!

Welcome back! Thanks for coming back! I've been spending my spare time sewing, and not blogging, although I haven't been spending that much time doing either! :)

I've been working on finishing my third butterfly quilt (Hope Takes Flight 3.0) using Scrumptious by Bonnie and Camille and Moda Bella solids. (I've been working on writing the pattern for it.) (Very exciting and very intimidating!).

Hope Takes Flight 3.0

And I've been working on another top secret project. I can't wait to get to show it to you and tell you the story. I can say, however, that it does not involve any fabric companies or books or magazines. It just involves family. A legacy. Heritage. And I'm pretty stoked about that. :)  If you follow me on Instagram, then you know what I'm working on. I'm fairly certain the secret is safe here, but I don't want to blow my cover! ;o)

So, back to the butterfly quilt. I finished the quilting on Monday night, but still need to bind it. I quilted swirls on the butterflies (like a broken record), and CLOUDS in the open space, and squiggles in the thin border.

Hope Takes Flight 3.0


Can we just talk about those clouds for a sec? OH. MY. GRANNY!!!!!  I love them more than warm brownies on a cold day. More than a full tank of gas and no one else in the car. More than a rainbow array of Aurifil thread. Well...maybe not that much, but they were SO fun!!! And different! (I love different).

Cloud Quilting


And so easy. I'm not kidding. Free-motion clouds are no harder than free-motion swirls, and easier than pebbles. I promise!

You should try them.

I've got to get back to my secret project, but I am glad I got to show you my butterfly quilt. (again!). :o)

I hope you have a wonderful, and crafty, week!

Linking up with Lee at Freshly Pieced for {WiP} Wednesday.
WIP Wednesday at Freshly Pieced

Monday, September 2, 2013

Making Super Hero Capes ~ with Arms!

A week or so ago, my oldest was invited to a birthday party for a boy in her class. They only started 2 weeks ago, so I was a bit unsure of what to give, not knowing him or his family. You know how some people expect a purchased gift for their child, and others feel like their kids already have too much crap stuff, and so a simple gift (that they will actually play with for more than 8 seconds) is fine? Man, I was hoping that Jack was one of the latter, but I didn't know! I texted friends, I asked Instagram...what do you do for a 6 year old boy? Legos, books...all good, but it's more stuff! Our children already have too much stuff

Well, then I had a revelation. Jack's party was a super hero theme, and they asked guests to dress as their favorite superhero or princess for the party...a party at the park. In the middle of the day. I wasn't too keen on having my girls wear their princess dresses to the park on a hot day! That's a recipe for misery and whining if you ask me! :) So I decided to make the girls a super hero cape, and one for Jack as well.
Super hero cape ~ almost done!

There was one thing I knew I wanted. Arms. I wanted the capes to attach on their arms, not their necks. I mean, come on!! Kids run, and jump, and swing, and slide, and sit, and sleep in their super hero capes, so why would I want to have them attach at the neck? That's just crazy talk! So I hopped on over to Pinterest to find a tutorial for a cape with arms, and what do you think I found? Zip. Nada. Zilch. Well, that's not true. I did find one tutorial where she made a cape for a toddler with a fat quarter. And it was what I wanted, but I didn't want to put in that much time and effort. I also found another tutorial for up-cycling a man's t-shirt into a super hero cape, but it attached around the neck again. :-/  Drawing blanks...

I happened to be near a thrift shop, so I stopped and grabbed a few t-shirts, thinking there had to be a way to make super hero capes that were easy and fun!  I washed them. No inspiration. I dried them. No inspiration.

I cut one up...
Super hero cape - fail

...pppppphhhhhbbbbbtttttt. Not quite what I was going for! (She was even less impressed than I was!)


And then after I put the kids to bed, I had an idea! What if...I cut the collar to make the arms?!  Could it work?

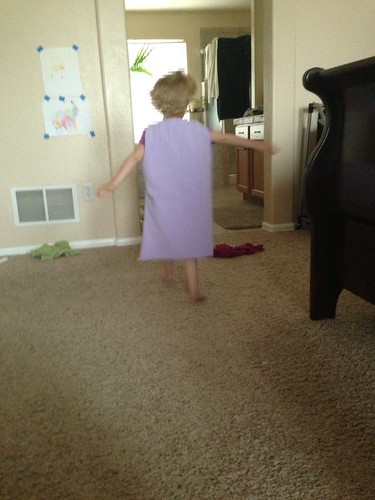
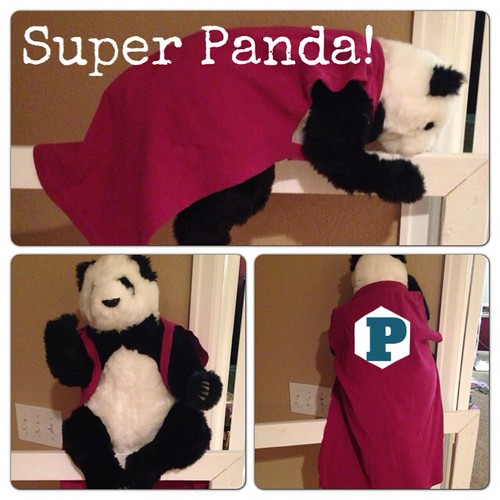
I commenced to cutting some more, and since the girls were in bed, I had to rely on an inferior model. One that seemed more compliant, though probably not as willing to run around the yard. ;)
Super Hero Cape with arms ~ a tutorial


So then I started to really pay attention to what I was doing so I could share it with you! Because while these are NOT going to be the best selling capes on Etsy, they are good for playing in, and most kids need to play - and imagine - more. Amen.

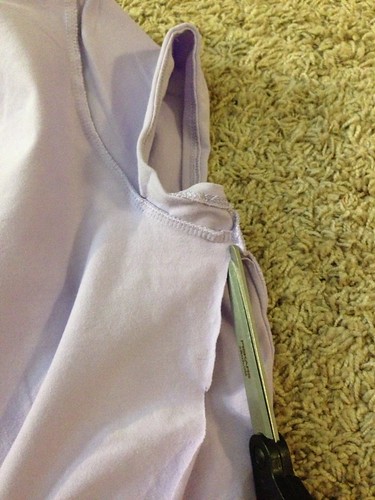
1. After you have washed your thrifted shirt, cut up each side to the armpit. If there is a seam, cut on the back side of the seam so it won't be there when the shirt becomes a cape.
Super Hero Cape with arms ~ a tutorial


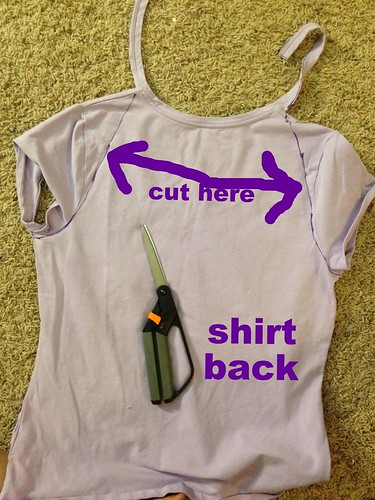
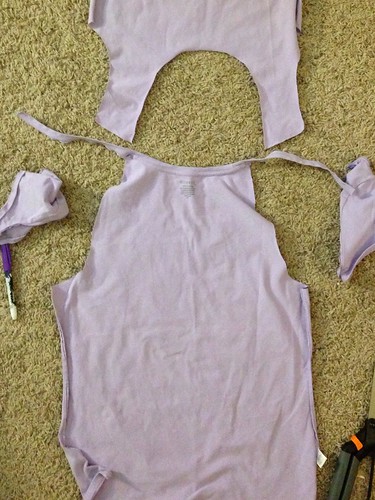
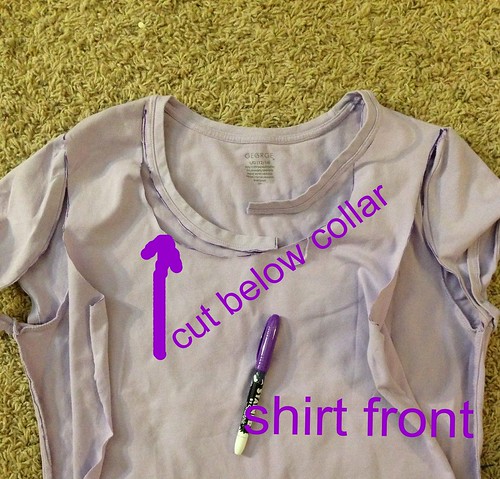
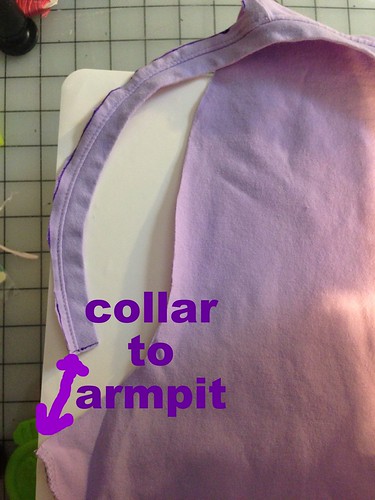
2. My pictures don't quite reflect this, because I figured it out later, but on the back of the shirt, from the armpit, you want to cut at an angle (see the purple marks) on the inside of each sleeve seam, up to the shoulder seam about an inch away from the collar, then crossing over the shoulder seam, cut along the bottom of the collar all the way around to the other shoulder seam.  Go back to the center of the collar, and snip it right in half.
Super Hero Cape with arms ~ a tutorial

Super Hero Cape with arms ~ a tutorial


3. Now, rather than continuing down the front, which you can definitely do, I went back to the other armpit, and cut up to the shoulder seam at an angle, to the point where I had just cut under the collar. Hard to visualize, maybe, but this is what it looks like when it's finished.
Super Hero Cape ~ with arms


You can also cut away the front, and then the back (like I did in the pictures), but you can do it in fewer steps the way I just said.

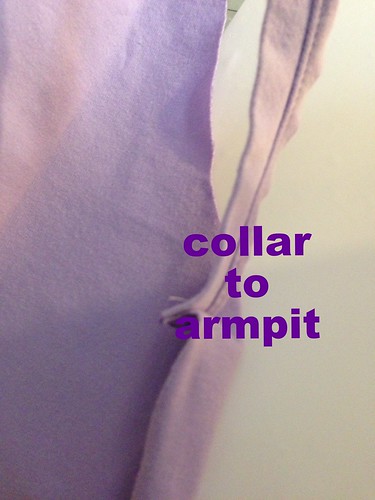
4. Now that you've only got the back and the collar, it's time to make the arms. (I honestly can not tell you HOW excited I am that their capes don't have choke-collars!)  Take the left collar-half, and bring it down to where the armpit met the side seam. There's a little corner there, and it's the perfect place to attach the collar. I measured each girl to make sure this location of attachment was good enough. It's not necessary, but I matched the outside of the collar to the outside of the t-shirt, and pinned them together. Then I went to the sewing machine and used a zig-zag/overcast stitch to fix the collar to the side seam. Repeat for the other side.
Super Hero Cape with arms ~ a tutorial


Super Hero Cape with arms ~ a tutorial
(not small enough!)

You can see below, I had to make some drastic modifications for my littlest one's arm holes. Attaching at the corner like I did with the others was just TOO big for her. This made it much more manageable. :)
Super Hero Cape with arms ~ a tutorial


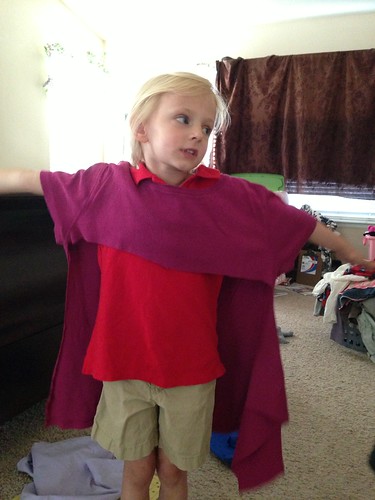
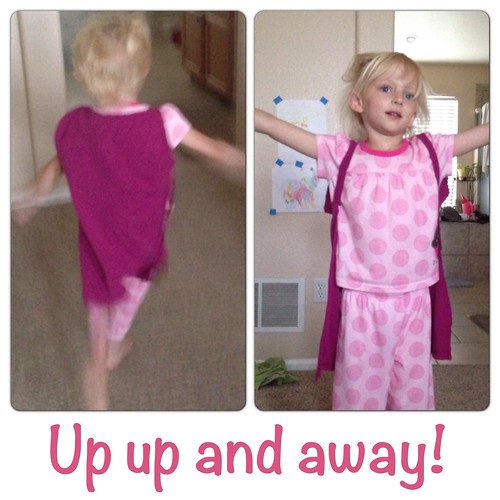
Here you can see my big girl modeling hers.
Super Hero Cape with arms ~ a tutorial

Much better this time! :)

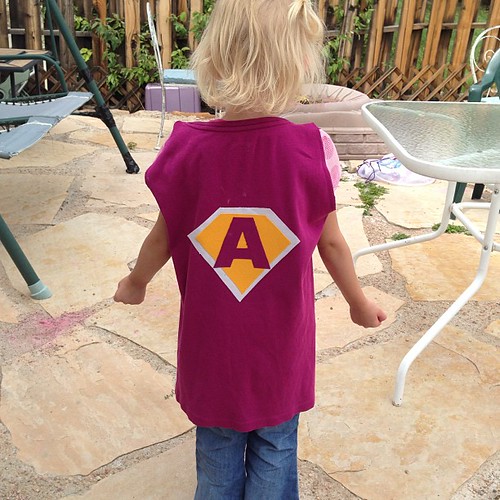
After I got the capes made, next I had to embellish them and put shields on! I'm not going to go into that here -- this is long enough already -- but it was simple applique. I cut the shield shape out of freezer paper, and used it to cut my white out of woven cotton. The yellow (another thrifted t-shirt, of course!) and pink (from the front of her shirt) were knit, so I attached fusible interfacing (don't know the brand, sorry!), and then cut my shields out and ironed them onto the white. Then I cut out the letters, fusible interfacing again, and then sewed them all (1/8" seam allowance) to the capes.
Here she is wearing her finished cape:
The shield needs to be sewn down, but I like it! Up-cycling at it's best! #superherocape

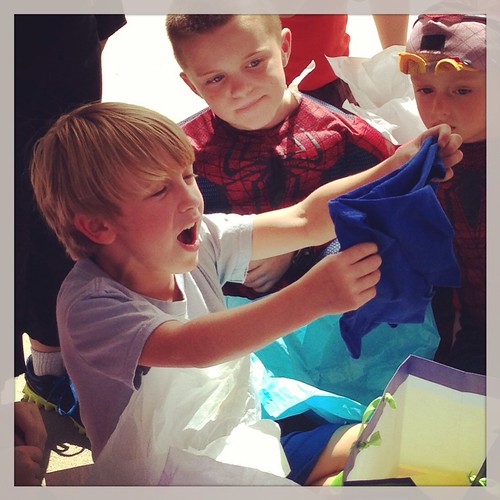
And here is the birthday boy opening it up, putting the "awe" in "awesome!". :)  He had great responses for every single gift.

Jack loved his cape. :-)

There you have it! A super hero cape made in two days flat! ;-) (It won't take you NEARLY that long!) I know this is a long post, but I hope it makes sense! Give it a try! If you have any questions, let me know. I'm happy to help. :)
As I stated, I was inspired by those other two capes that I linked to. I have never seen a cape like the ones I designed, though I looked high and low. If someone else has already made one, I am happy to link to that tutorial , although I won't say I was inspired by them. Because I wasn't. :) If you would like to notify me of another super hero cape like this, please feel free to email me at the address listed in my profile. Thank you for being polite.