A couple of weeks ago, my good friend,
Aunt Spicy told me she was doing a
tutorial for Sew, Mama, Sew's Pillow Month and shared her tutorial with me early. The tutorial is fabulous, and if you haven't seen it, you should
go check it out. It's something that I believe anyone can do.
I believe it so much that I decided to
have help Mookie make it! Well, a modified version of it, but still, Aunt Spicy inspired me! I decided that Mookie could make a special fleece pillow for Dave for Valentine's Day. She's all about calling us "Mom" and "Dad" whenever anyone else is around, but if it's just us at home, we're "Mommy" and "Papa" again. She's pretty cute.
I will tell you that I spent a little time online looking at tutorials for sewing with children. Sew, Mama, Sew has a
really good blog post about sewing with kids of different ages. And I found
this one on Whipstitch. It's an ongoing series, so you'll have to check back, but they make some really great points and encouragements.
I started over a week ago. Mookie is 2, and has the attention span of a two year old. :o) If you are planning on doing this with your toddler for, say, Mother's Day or Father's Day, I would suggest starting at least a week or two early.
All of the steps are very basic, but the teacher in me is pushing and shoving her way out...so you get a tutorial! Lucky you, right. But, I will say this...there are some precious photos that make reading this tutorial TOTALLY worth it. :)
Ingredients
1/2 yard red fleece
fusible interfacing
6"x10" white quilting cotton
poly-fil pillow stuffing
red yarn
yarn needle (plastic if working with a toddler)
white embroidery floss
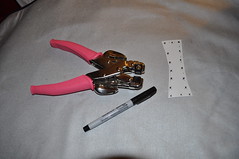
Crop-A-Dile (scrapbookers know what I'm talking about. It's a tool I somehow find a million uses for!)
Step 1 -- Prepare your fusible interfacing. I used a lightweight heat-n-bond, but that's all I had. I would recommend using something a bit stronger if you're going to be fusing onto fleece like I did.
Follow the instructions on the label...especially the part about writing or drawing your image
backwards on the paper part of the fusible interfacing. If you've never fused for applique, you may not know what I'm talking about. Just trust me on this one. For me, the I, the
©, and the U were reversible, so it didn't matter, but I've run into trouble before when I've forgotten to reverse my image when drawing it out.
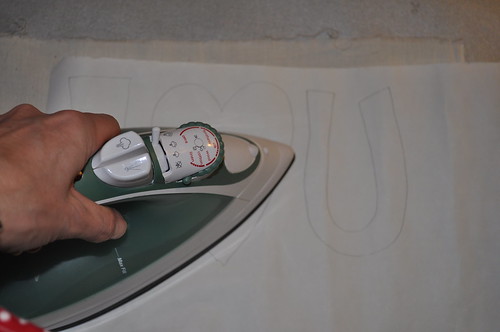
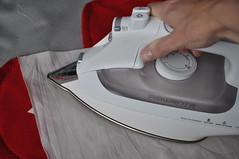
Step 2 -- Iron your design onto the white cotton. Following the directions on the label, iron your design onto the white quilting cotton. Make sure it's all fused onto the cotton. And not your ironing board. :o)
Step 3 -- cut out your images, your letters, your design. If your child is comfortable with cutting along a line, you could have him/her help you with this step.
Step 4 -- Prepare the design for toddler sewing. This is where I used my Crop-A-Dile. I love this thing. If you've never seen one, or used one, in real life, it's a real treat...especially if you scrapbook or make cards! This thing makes light work of some of the heavy lifting in scrapbooking and card making. It came to my rescue when I wanted to pre-cut some little holes for Mookie to sew through, though. Wow. I'm glad I had this. If you don't have one, though, you could try to borrow one from a friend, or make holes in your design another way. A regular hole punch didn't work very well. You could take an exacto knife and cut a small X at each point you want your child to sew.
Anyways, I marked out some places I wanted to punch holes. (Oh, and leave the paper on for this step...you are marking the paper here, and the Crop-A-Dile works best with the paper still attached.)
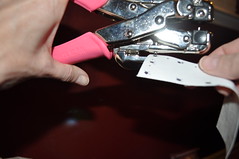
Step 5 -- Punch holes in your image. This probably isn't necessary for most children, especially older ones, but I found that if Mookie had a hole already there, she was more likely to put the needle into that hole. If there was nothing there, she didn't know where to put the needle. We'll work on that, but for now, this is what worked for us.
Step 6 -- Remove the paper, revealing the shiny (adhesive) side of your image.

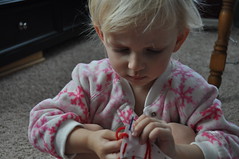
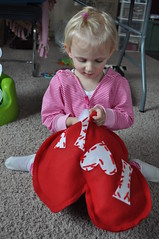
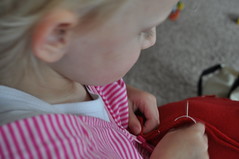
Step 7 -- Grab a large cup of patience, and set the other parts aside for, oh, 3 days. In this step, the child will "sew" an outline around each shape with the red yarn. Mookie really liked sewing, but she wouldn't do it for very long. So, we'd put it away, and pick it up later in the day, or the next day. I used one strand of red yarn, threaded and knotted the needle, and let her go. She totally understood what she was supposed to do. She didn't necessarily stitch a perfect running stitch, but she went into the fabric, and out of the fabric. Like a champ.
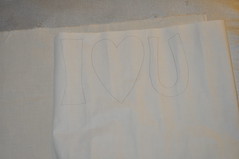
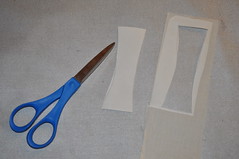
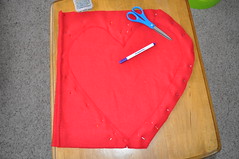
Step 8 -- Actually, while your child is sewing the outline on the design, you can be preparing the pillow. I folded my 1/2 yard of fleece in half, and then cut
about 15 inches in, so I had 2 layers of fleece. I then freehanded my heart, and pinned around the heart. I started to cut around the pins, but I decided that wasn't necessary, so I stopped. :o)
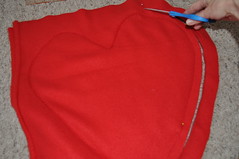
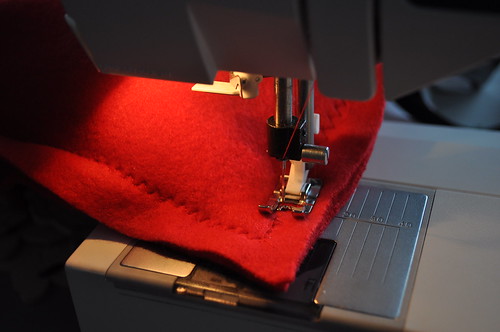
Step 9 -- Sew heart pieces together. It wasn't necessary to cut around the outside of the pins because I was going to sew it, then cut around the seam! I used a zigzag stitch and stayed pretty close to my line (perfection is not necessary here because the stuffing will make your lines go out the window anyways!). I sewed
almost all the way around the pillow, but left a 4" gap for stuffing the pillow.

Step 10 --
NOW you can cut the heart shape! I cut about 1/2" past the seam. Again, perfection is a waste of your time. (doncha love it?!)
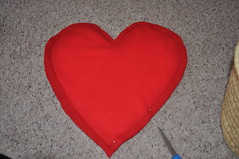
Step 11 -- Admire your work. And grab another cup of patience because it's taking your child a sweet forever to sew that silly thing! :o) Or, just put it away for another day.
Step 12 -- Prepare to fuse the image onto the fleece. (make sure the shiny side of your design is down, touching the fleece, because that's the adhesive and you don't want to fuse the
© to your iron! I just put them down to determine placement while the iron was heating up.
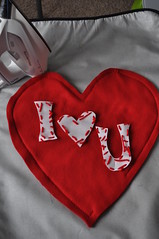
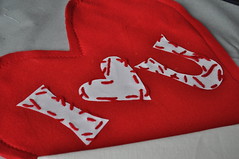
Step 13 -- Fuse image to fleece. I place a scrap of muslin between my iron and the fleece and yarn, just because I didn't know if the iron would melt any of that. It was a good thing. You can check your work to see if the image did fuse to the fleece, and if not, you can iron again.
Step 14 -- Admire your work. It's gonna look good!
Step 15 -- Stuff the pillow. I pulled little handfuls of the pillow stuffing out of the bag and piled them up for Mookie to stuff into the pillow. She had a hard time at first, until I pinned the front and back sides of the opening, well, open for her. That made her job so much easier. Have your child stuff away.
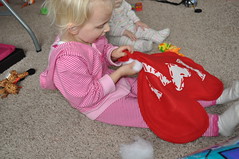
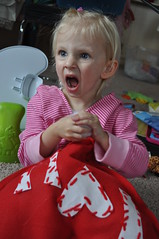
Tell me, though...did your child open his/her mouth subconsciously as they were stuffing the pillow? Because I
still get the biggest kick out of looking at these pictures of her. Mouth wide open watching Mickey Mouse while she stuffed this pillow she's so proud of. :o)
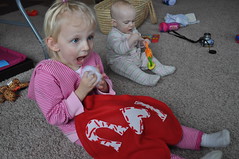
Dude. You can't make this stuff up. I love this girl so much.
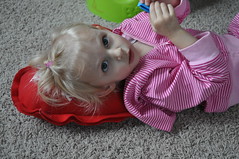
Doesn't she look proud of her work here? And she should be! She is making something for Dave that he will treasure.
Step 16 -- Test it. She wanted to make sure it was fluffy enough. It was.
Step 17 -- Sew 4" opening closed. It was a little tricky, but not terrible to sew an already stuffed pillow.
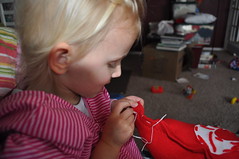
Step 18 -- Sew border around pillow. I threaded a yarn needle with 6 strands (one layer?) of embroidery floss, and I sat her on my lap, and let her go to town sewing a border around the pillow. She never hurt herself, and she did a pretty good job of staying fairly close to her last stitch. I think this step took 3 or 4 sessions.
Have your child stitch all the way around the pillow.
And, the big finish:
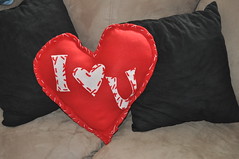
It's certainly not perfect, and I helped, probably, more than I needed to, but Mookie is pretty proud of herself and her work. (the picture at the top was taken when Mookie gave the pillow to Dave)
****
I have entered this pillow into
Stitched In Color's Blogger's Pillow Party. There are some truly
amazingly beautiful pillows there, but I did it because I want to encourage other moms of young kids to start sewing with their littles early! It may not win any awards, but it won her father's heart, and that's all that matters. :o)