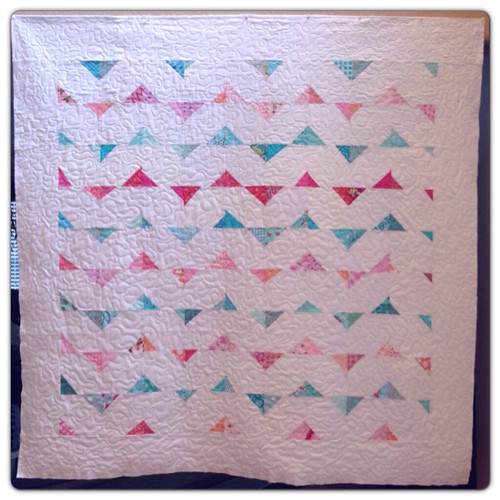
All that's left is the label, really. Last night I finished the binding -- it was magical!!! I used Susie's Magic Binding technique, demonstrated here on my friend Marti's blog. I stink stink stink at machine binding, so I wanted to try this, thinking maybe this will work and it won't look like something the dog rolled in! And it does! It does! It DOES!!
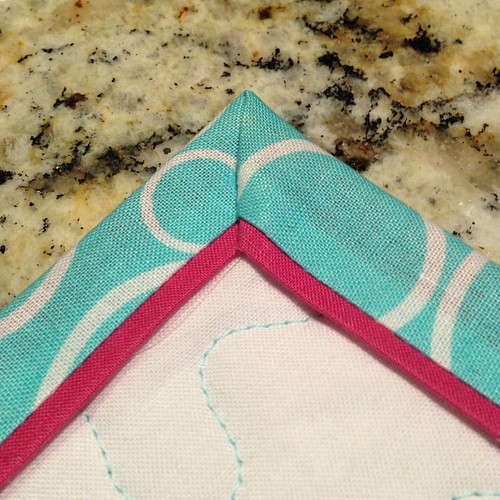
Here is a picture of the purdy mitered corner...
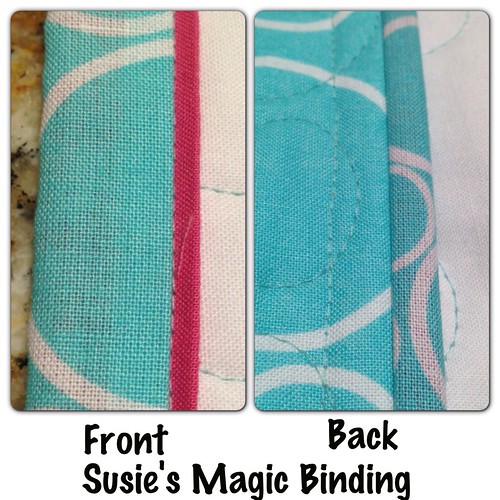
And here you can see the front and the back. Honestly, this is the closest-thing-to-perfect my machine binding has EVER looked!!
I'll put a label on it this week, and take it to Restore Innocence. They were very appreciative the last time I took them some quilts, and I know they are so happy to bless the girls with these quilts. :)
And then I'll put my sewing machine away. I've got a lot going on this weekend, and sewing isn't going to be a part of it. :( But then next week, I will put on a brave face and make Janice's paper-pieced blocks for our Bee Happy bee. I'm only marginally better at paper piecing than I am at machine binding!
And I've designed a few quilts that I am SUPER eager to make! Aunt Spicy is my partner in crime on these, and keeps encouraging me to make more! What a friend, right?!? And I loved getting back to the long arm. It seems I'm prolific at the first and last steps of the quilting process, but I'm a slow turtle at actually MAKING the quilts! I need to get faster. I have two baby quilts to make, and only know the gender of one of them. If the unknown is a boy, then I'll give my Huckleberry quilt I made when Latifah Saafir was here in May. If it's a girl, I'll do something quick and easy and double the recipe. ;-)
I am linking up with Lee at Freshly Pieced. Go check out the linky party. There's some beautiful stuff being made!


That is a unique way to do binding yes and it looks so professional! Beautiful quilt finish!
ReplyDeleteYour mitered corner is awesome! Congratulations on such a pretty finish.
ReplyDeletebeautiful job on the binding! I am going to look at the tut you shared...so far I do the cheater binding because I just could not get real binding to work perfectly, so ty!
ReplyDeleteI am stopping by from the WIP hop, my post is here if you have time to stop by :) http://domesticdeficitdisorder.blogspot.com/2013/07/wip-july-17th-edition.html
I LOVE it, Mel!!! And your binding is fabulous. I'll miss seeing it at show and tell :(
ReplyDeletei love that two color binding technique! thanks for sharing!
ReplyDeleteI am in absolute awe of your binding. It is incredible.
ReplyDeleteThe binding looks wonderful Melissa...and the mitered corner is spot on! I'm going to keep this in mind for my next binding. I've used Rachel's zigzag binding with good success. It has a more casual, fun look to it.
ReplyDeleteIt looks great, and fab job on the binding!
ReplyDeleteOh that binding method is pretty close to how I do mine, but without the flange. I sew the binding onto the back, and then stitch on the front as close to the edge as I can, since it's easier to make it look nice on the side you can see (thus why I stitch it onto the back to start with.) But this is EVEN better because of the rad pop for color and stitch in the ditch line! Woot! Thanks for sharing!
ReplyDelete